|
|
PF-Tek for Simple Minds
for the cultivation of grain - loving mushrooms
(Psilocybe cubensis)
( updated: December 04, 2024, at 01:34 PM )
dead link reports, comments and suggestions welcome any time
|
|
The PF-Tek was developed and first made public in 1992 by www.fanaticus.com (mirror).
This tek made the cultivation of mushrooms at home feasible for complete beginners utilizing commonly available materials.
The growing method I describe here is based on the PF-tek but includes a few modifications that are time tested, and are in my opinion superior to the original PF-tek.
I strongly recommend you to read the original PF-Tek, if you haven't done so already, to see a different approach to some steps.
The PF-Tek for Simple Minds is as simple and as foolproof as it gets, but is not completely foolproof of course. Following it will give you good chances of succeeding and a good idea on the general process and time line and prepare you for higher yielding teks, like using whole grains and dung.
The PF-Tek for Simple Minds uses ½ pint (~240ml) canning jars or drinking glasses and a growing substrate made of vermiculite, brown rice flour and water. The substrate is mixed, filled in jars, sterilized and inoculated with mushroom spores. After the substrate is fully colonized the substrate cakes fruit in a humid container.
On the subject of cleanliness
By growing mushrooms indoors on a nutritious substrate you create conditions than not only favor the growth of the mushrooms, but also the growth of a large number of other organisms(molds, bacteria), many of them potentially hazardous to the health. To ensure that only the desired mushroom is grown, it is very important to assure cleanliness in all of the cultivation related procedures.
Before you work, wash your hands with (antibacterial) soap and warm water. Afterwards, wipe them dry and rub with Lysol or isopropyl alcohol(iso-propanol). Keep the place where you do the inoculation and fruiting dust free and clean and don't bring in dirty clothing or shoes. Personal hygiene is equally important. Dirty hands and even dirty hair are a hotbed for all kinds of unwanted microorganisms which can destroy your cultivation project.
Materials
Most materials are easily avaliable at the local shops.
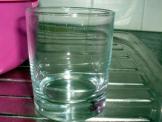
Vermiculite
|
Vermiculite is made from a naturally occurring mineral - mica.
Crushed mica containing water is heated and expands to a volume several times greater than that of the untreated mica.
Vermiculite is able to hold several times its own weight in water and it gives the substrate an airy structure.
Vermiculite is available in several grades, the middle and the middle-fine grade are most suitable for cultivation purposes.
| 
|
Online sources for vermiculite
USA
Amazon
Hoffman A H #16002 8QT Vermiculite
Espoma VM8 8-Quart Organic Vermiculite
Ebay
Canada
www.auroralighting.ca
United Kingdom
www.gro-lite.co.uk
Australia
users.bigpond.net.au/nutriflo/
Generally you can get vermiculite in garden and hydroponic stores, in some regions also in pet shops.
Brown rice flour (BRF)
|
BRF is available in health food shops either already ground, sometimes though there is only whole brown rice available. In this case you can grind the rice either in the shop or if this option is not available, grind your own using an electric coffee grinder.
Amazon
Bob's Red Mill Rice Flour Brown
BRF is also available at Ebay:
BRF is best kept cool and dry for prolonged periods of time, since it can easily become rancid because of the fat content of its husk.
If you are unable to find BRF you can also use whole rye flour, ground millet or ground millet based birdseed with similar results..
| 
|
Water
Water used for the substrate preparation should have drinking water quality. Tap water is usually OK, but if you're not sure about it, better use bottled drinking water or mineral water.
Spore syringe
|
A plastic syringe with needle attached containing 10cc-12cc suspension of mushroom spores in water.
The color of the suspension varies from completely translucent to slightly violet depending on the quantity of the spores in the solution.
Spores are microscopic so as long as you see at least a few specs in more or less clear water the syringe should have plenty of spores.
Available through the internet, for instance
www.sporeworks.com
www.thehawkseye.com
and many more.
|
|
Jars
Substrate preparation
|
For one ½ pint jar(~240 ml) you will need:
=> 140 ml vermiculite
=> 40 ml brown rice flour
=> some vermiculite to fill the jar to the top (app. 20 ml)
=> water
For 6 jars, this amounts to:
=> 3.5 US cups vermiculite
=> 1 US cup brown rice flour
Note:
½pt (US pint) = 1cp (US cup) = 236ml(milliliter) = 236cc(cubic centimeter) = 1/4 qt(US quart)
|
|
|
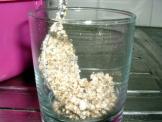
Put the required amount of vermiculite for all the jars of one batch (for instance 6 jars: 6 x 140 ml = 840 ml ~ 3.5 US cups ) in a bowl.
|
|
|
Pour water slowly over the vermiculite while stirring with a spoon.
Be careful to only put that much water in as it can be absorbed by the vermiculite. Stir it well so all the vermiculite is uniformly soaked with water.
|
|
|
When you tilt the bowl you should see just a little water starting coming from the vermiculite.
This is when the correct water content is achieved.
If there is too much water in the bowl, pour the wet vermiculite in a strainer and let the excess water drain for a minute. Then the vermiculite will be at the field capacity, which is perfect.
|
|
|
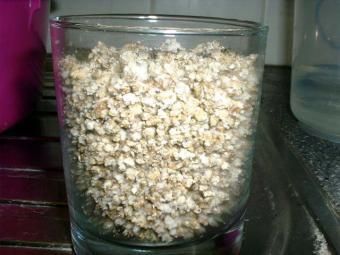
Now put the required amount of the BRF (for instance 6 x 40 ml = 240 ml = 1 US cup) into the wet vermiculite at once and mix it in with the spoon. The goal is to uniformly coat the wet vermiculite particles with a layer of BRF.
|
|
|
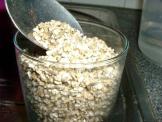
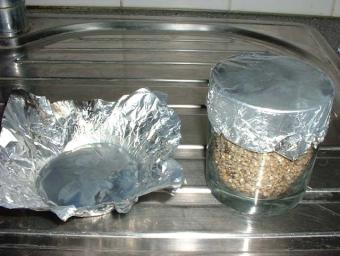
Fill the mixture in jars ½ inch (1cm) under the top. It's very important to fill the substrate in the jars without tapping it down at all. It should stay very airy and loose to provide optimum conditions for the growth of mycelium.
Be careful not to leave any substrate on the upper edge of the jar. If you weren't careful enough and there are some substrate specks at the edge take a clean moist cloth and wipe the upper portion of the jar clean. Otherwise contaminants can start at those spots and work their way down into the jar.
|
|
|
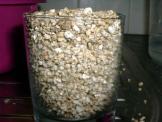
Fill up the jar with dry vermiculite to the top.
This layer hinders airborne contaminants reaching the underlying substrate in case they manage to come in during the inoculation and incubation.
|
|
|
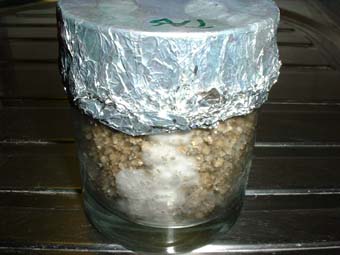
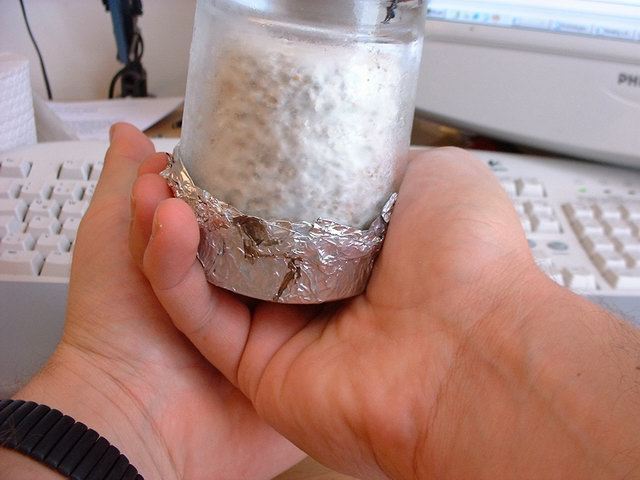
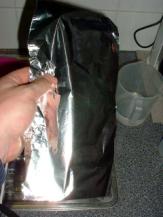
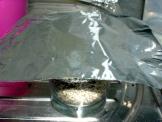
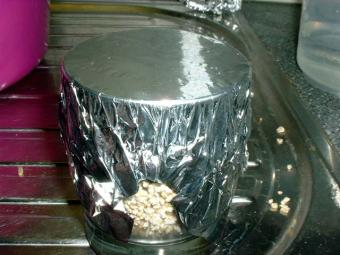
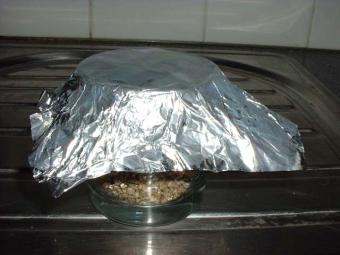
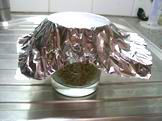
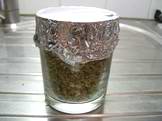
Take a 5in(12cm) wide stripe of aluminium foil and fold it in the middle.
Put the foil over the opening of the jar as shown in the pictures. If you're using jars with metal lids, you can poke 4 holes at the very edge of each lid with a small nail and hammer and screw the lid on. The holes should be slightly bigger than the diameter of the syringe needle.
|
|
|
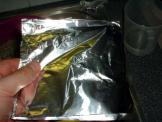
Fold the foil edges up and press them together so you get a nice aluminium foil lid.
|
|
|
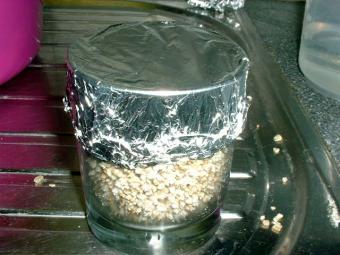
Then take a piece of foil measuring 5in x 5in in and put it over the first two layers (respectively the metal lid if you're using lids) leaving the edges of the foil reaching down, since it has to be lifted again during the inoculation.
So now you have 3 layers of foil over the opening. The top layer is lifted during the inoculation.
|
|
Sterilization
|
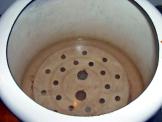
Pour approximately 1in (2.5cm) of water into the pressure cooker, don't put in too much water otherwise it will come into the jars and alter their water content.
Then stack the jars into the pressure cooker. The use of a rack to keep the jars from directly touching the bottom of the cooker is strongly recommended.
Put the lid on and bring the cooker to the required pressure (15 psi = 1atm over atmospheric pressure) slowly over a period of 15 minutes on a medium flame.
|
|
If you heat up the cooker too fast this can cause the jars to crack.
As soon as the steam begins to escape the rocker or the vent at the top of the pressure cooker turn the heat back so only a very small, steady steam flow persists from the vent. From this point on, pressure cook for 45 minutes.
Depending on the pressure cooker model the cooking procedure works a bit different so if you're not familiar with pressure cooking consult the instruction manual or someone who used pressure cookers before.
After 45 min take the cooker from the flame and let cool for at least 5 hours or even better over night.
If you never used a pressure cooker before check out this document about the correct pressure cooker use.
If you are unable to find or buy a pressure cooker, you can also sterilize the jars using a big pot with a lid.
In this case steam the jars for 1.5 hours in a pot lid on. Use only approximately 1 inch of water at the bottom.
You might have to add some water to the pot during steaming due to evaporation.
Inoculation
|
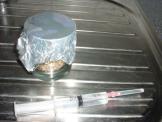
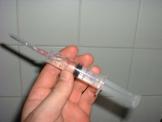
After the cooker is cold to the touch take the jars out and place them on a clean surface, have an alcohol lamp or a lighter and the spore syringe ready. Shake the spore syringe to break up the spore clumps.
|
|
|
To be able to shake it it's necessary that there is a small bubble of air in the syringe. If this is not the case, then you can suck approximately 1cc of sterile air into the syringe by placing the tip of the needle into the flame and slowly pulling the plunger back.
|
|
|
Loosen the foil from all of the jars so it can be lifted easily when you inoculate.
|
|
|
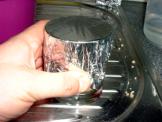
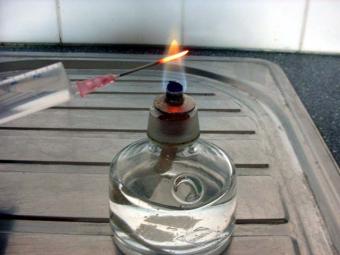
Take the cover from the needle and heat it over the flame until glowing red. Let cool for a few seconds
|
|
|
Take the upper foil layer off and put aside upside down.
|
|
|
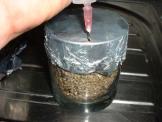
Pierce the foil at the edge of the jar with the needle app. 1in(2.5cm) deep and inject the spore suspension towards the inner jar surface. You should see a small drop running down the inner surface of the jar towards the bottom. Each jar is inoculated on 4 equally spaced points. You should use 1 - 1.5 ml of the spore suspension per jar so one 10ml syringe is sufficient for 6 -10 jars.
|
|
|
Put the foil on again. Flame sterilize the needle again after inoculating 3 jars to prevent cross contamination just in case a jar wasn't properly sterilized.
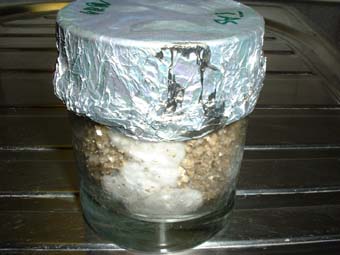
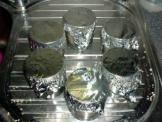
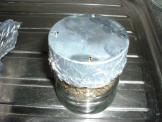
When all of the jars are inoculated fold the foil edges up and press them firmly together so you get a nice aluminium foil lid. Write the inoculation date and the species/strain information on the foil with an all surface felt tip pen. If you touch something other with the needle during the inoculation procedure except the foil surface of the bottom foil layer immediately flame sterilize the tip again.
|
|
Incubation
The jars should be stored at 21-27°C (70-81°F), the warmer the better, but not exceeding 27°C. If you don't have these temperatures at home you can build an incubator to accommodate the jars.
Incubator
|
The inoculated jars develop fastest if they are stored at a temperature of 27°C (80°F) (According to Stamets the best incubation temperature for P. cubensis would be 86°F, but since the jars themselves are a few degrees warmer than the surroundings (mycelium emits heat when growing) 80°F is a good and safe incubator temperature)
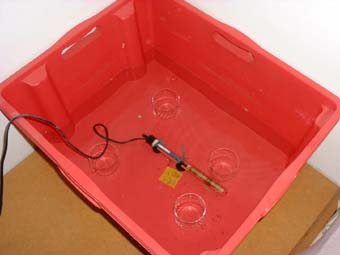
You can build an effective incubator by using two plastic boxes of the same size and an aquarium heater.
There are several types of aquarium heaters. When you're buying a heater, make sure that it is of the "fully submersible" type.
Attach the heater to the bottom of the first box and pour in as much 27°C warm water that the heater is completely submerged.
Adjust the heaters thermostat so that the heater just shuts itself off at 27°C .
Put some spacers on the bottom of the box, they carry the second box and prevent it from touching the heater. In the above picture 4 jars are used. You could also use bricks, stones or something similar.
|
|
|
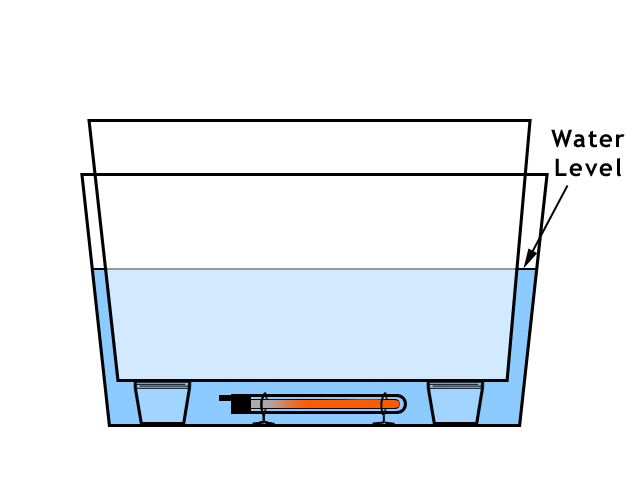
Put the second box in the one containing water.
After a few hours measure the temperature again and adjust the heater if necessary so the water temperature is 27°C.
|
|
|
When the box is empty, it will float on the water.
The water level in the lower box should reach app. 2/3 the height of the box, supposing the upper box is in place loaded with jars and resting on the spacers.
|
|
|
Now you can put the inoculated jars into the box.
|
|
|
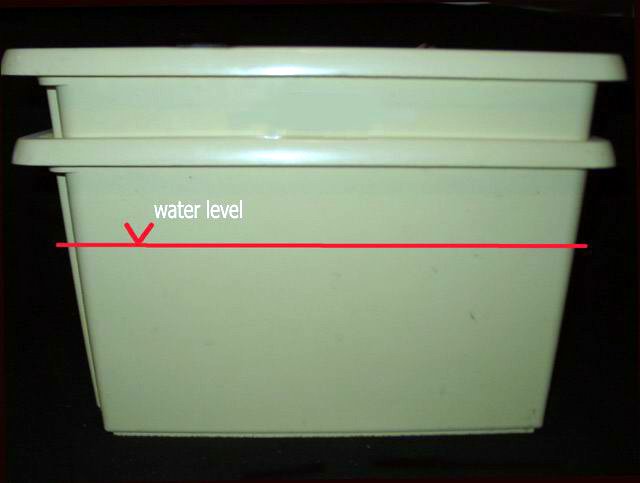
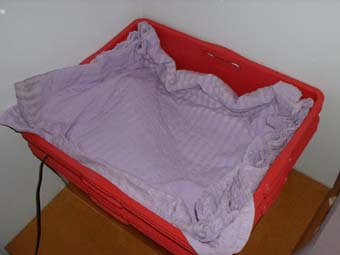
Cover the jars with a blanket to keep the heat escaping and to keep the jars dark. Note: the water level drops in some weeks by evaporation. Therefore you have to fill some fresh water in from time to time to keep the water level high enough. Never let evaporate so much water that the heater isn't submerged in water anymore!
|
|
|
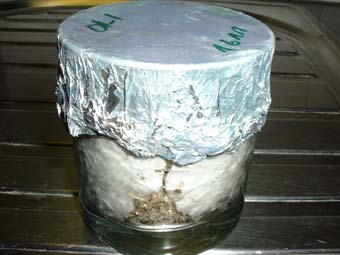
Providing the jars are kept warm you should see the first sign of germination after 3-5 days as bright white specks. This is mycelium. If anything grows that is not white, for instance green, black or pink, then the jars are contaminated and their content must be discarded and your clean procedures need some improvement. After the jars are emptied and the jar is washed with detergent and hot water it can be used again.
Check the Shroomery Contamination FAQ for more information on possible contamination in mushroom culture.
|
|
|
Depending on the temperature and the viability of the spore syringe it takes 14-28 days for the mycelium to colonize the whole jar. Once colonized store the jars at normal room temperature, about 21°C (70°F) to initiate pinning.
Don't expose the jars to direct sunlight. Indirect sunlight (= the natural light that lights up a room because at day time out) or a low wattage lamp (cool white fluorescent lamp is ideal, incandescent lamp is less suitable) for 4-12 hours a day is sufficient.
|
|
|
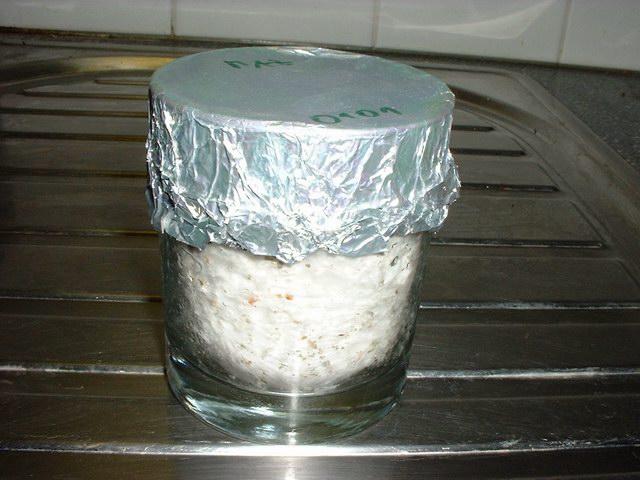
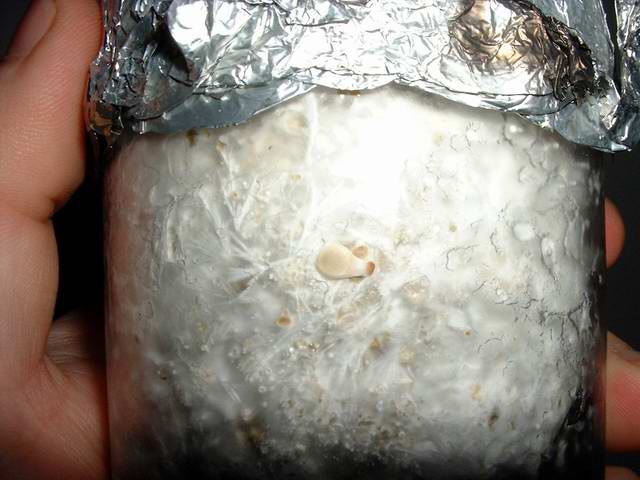
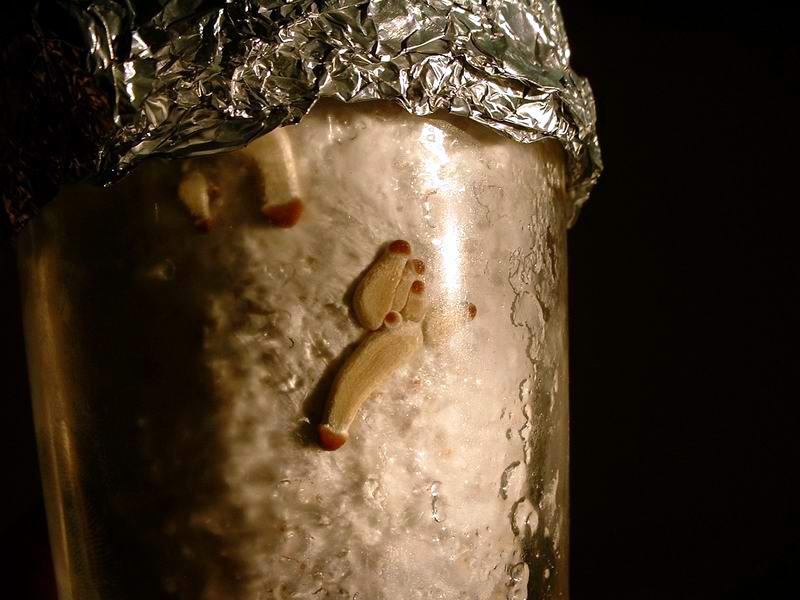
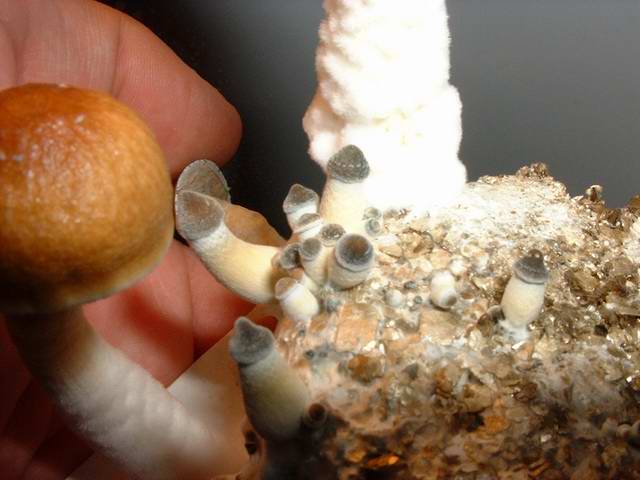
Within 5-10 days (with certain mushroom strains it can however take up to 30 days) pinhead-size accumulations of mycelium should form. These so called pins represent the beginning of mushroom growth. In the following days also small mushrooms with brown heads become visible. When this is the case it's time to birth the cake into the fruiting container where the mushrooms can develop to maturity.
Some strains don't easily develop pins. In this case put the colonized jar wrapped in a plastic bag in the fridge over night and then proceed to fruiting next day, even if the cake doesn't show pins yet. This cold shocking usually helps trigger pinning somewhat.
|
|
Fruiting
|
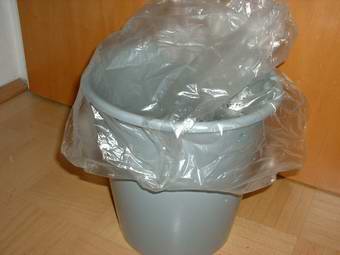
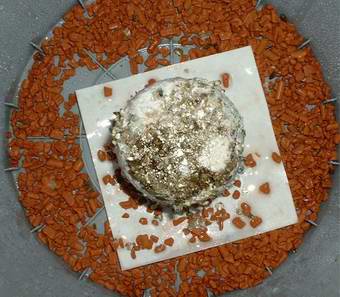
The fruiting of the cakes can be accomplished in any sort of container that can be loosely sealed and has at least one translucent side, preferably on the top. Suitable containers are a plastic bucket, Rubbermaid container, terrarium, aquarium...
Put an 1/2 inch layer of moistened perlite(pdf) or expanded clay pellets or even a wet paper towel at the bottom of the container and birth the cakes onto this layer by letting them slide from the jar upside down.
Alternatively one can first apply a casing layer.
|
|
|
Sometimes the cake doesn't slide out of the jar easily by itself.
You just need to turn the colonized jar upside down in your hand and slam the hand lightly against the palm of the other hand. This will make the cake slide against the lid and it can be birthed with ease.
|
|
|
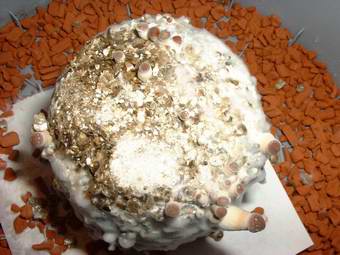
If you have a bigger fruiting chamber (a bigger plastic container or a terrarium) you can of course put in more than one cake to fruit.
The distance between the cakes should be at least 2" (5cm) for the mushrooms have room to grow. Put a sheet of translucent plastic over the opening of the fruiting container. Take this sheet off once a day and fan the air out with a piece of cardboard. If the bottom layer begins to dry out, spray it with some water to keep it moist since this layer provides moisture for the air to stay very humid. Don´t spray the cakes directly.
Handle the cakes as little as possible but when you do it always wash your hands thoroughly beforehand.
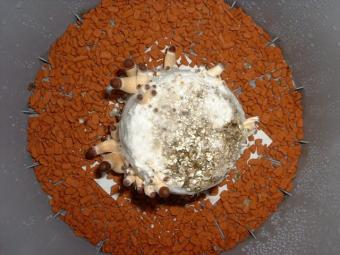
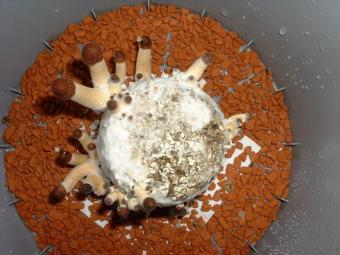
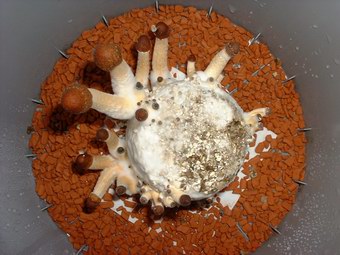
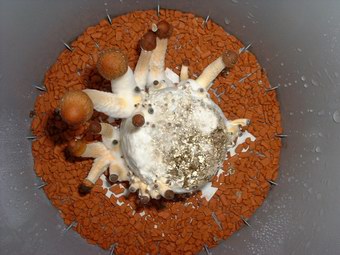
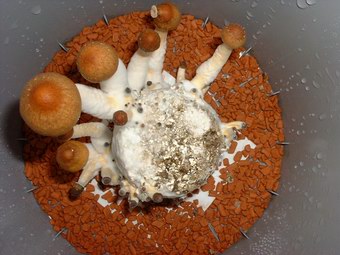
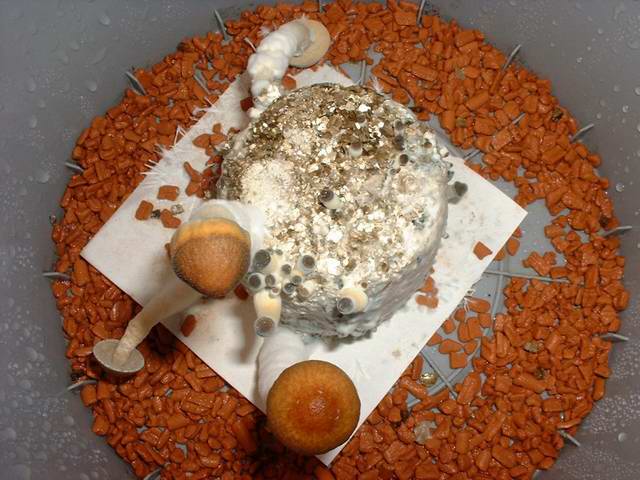
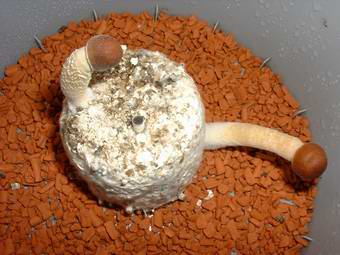
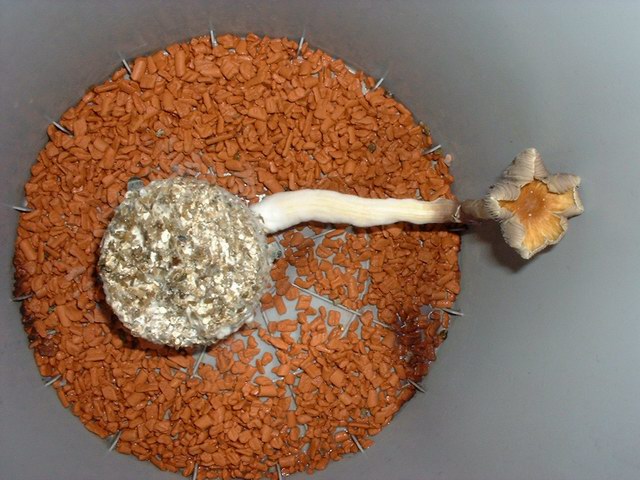
Over a course of the next 7-14 days the cakes will begin to pin(if the haven't began to pin in the jars yet) and the small mushrooms will grow big in a matter of 2-5 days and as soon the caps begin to open they can be harvested.
This simultaneous maturation of all mushrooms is called a flush.
|
|
|
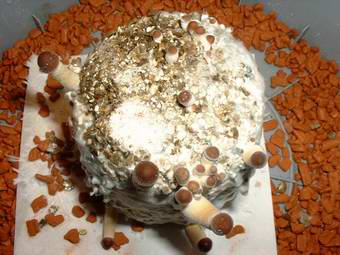
After the mushrooms have grown big there are usually a few small, stunted mushrooms left over, they are called aborts. They can be recognized by their blackish heads and the fact that they stopped growing at some point. Still they are good to use unless they are rotten.
|
|
It's crucial that you harvest all mushrooms, also the aborts, after the flush. This is most easily accomplished if you harvest the mushrooms off by gently twisting and tearing them off the cake with clean hands. Optionally you can dunk the cakes after each flush, this can increase the flush size significantly.
|
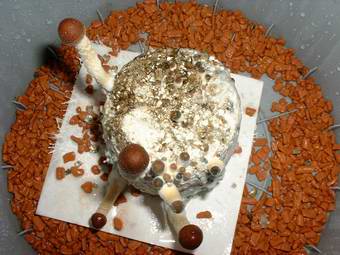
After approximately one week small mushrooms begin to form again and mature during the next days.
This cycle can repeat itself up to 4 times sometimes even more. After that the cake is exhausted it produces no more mushrooms and can be discarded. They can be also used to start outdoor beds.
|
|
|
Sometimes green mold attacks the cakes even before they are completely exhausted. If this is the case remove and discard the contaminated cakes immediately to prevent the spreading of the contamination.
|
|
|
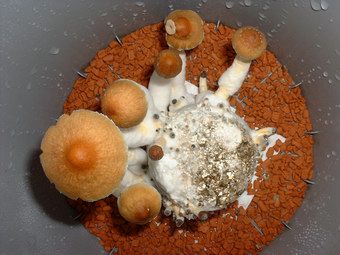
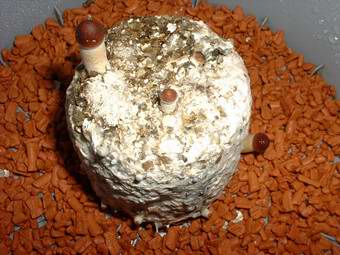
3rd flush:
|
|
|
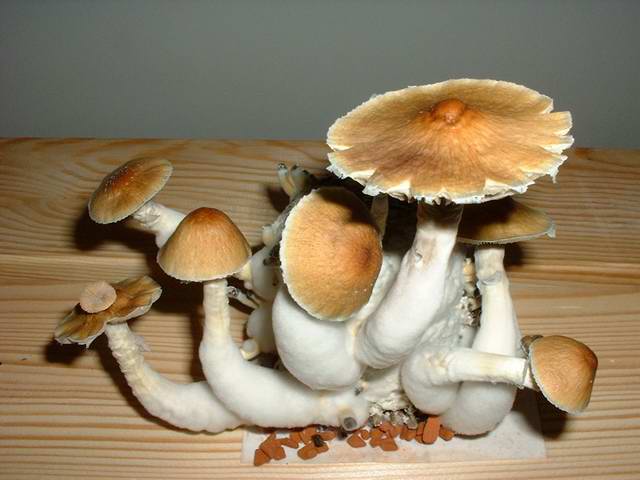
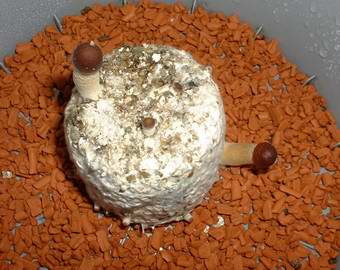
4th and final flush:
|
|
1 vistors are currently browsing this page, 5 total.


 I made a